
Ribs
Ribs Tattoo Stencil: Sizing, Distortion and Application
Direct answer
A ribs tattoo stencil is the hardest one to place accurately: the ribcage curves in two directions at once and changes circumference with every breath. Print the design at full size, hold the paper against the ribs in the exact posture the session will use, and mark where it lifts off the skin before you cut anything. Most ribs pieces run 15–30 cm (6–12 in) tall, and long straight lines, grids and perfect circles are the elements that show the distortion first.
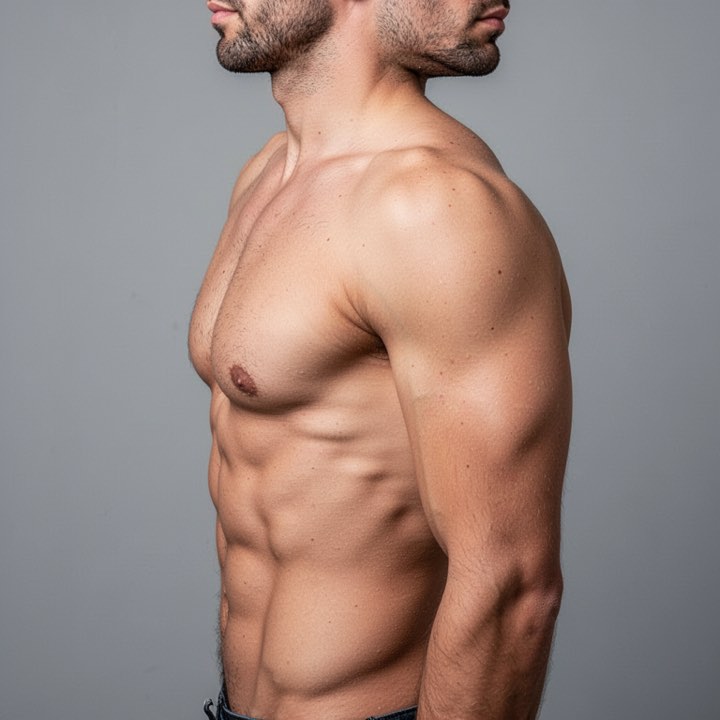
Ribs punish a stencil for every shortcut taken earlier. The surface curves around the torso and tapers toward the waist at the same time, it sits directly over bone, and it changes shape several times a minute. A stencil that transferred cleanly on a forearm can land on ribs visibly crooked and still be a technically perfect transfer — the paper was right, the surface moved.
Print it full size and test the paper on the ribs before you cut
Before you trim the stencil or open the transfer solution, print the design at true scale and hold the paper on the client. This is the check that catches almost every ribs-specific failure while it still costs nothing but a sheet of paper.
- Print at 1:1, not “fit to page”. Measure the printed design with a ruler and confirm it matches the intended size before you go near the client; on an InkLine print, the 5 cm check ruler on the sheet tells you at a glance whether anything rescaled it.
- Put the client in the exact posture the session will use — lying or standing, arm up or down — not the posture that is convenient for holding paper.
- Tape only the top edge of the sheet and let the rest fall against the body.
- Mark every place where the paper lifts off the skin instead of lying flat. Those tents are the distortion map, and they tell you where the design will be wrong before it is on anyone.
- Measure the largest gap. Under roughly 5 mm you can absorb it with skin stretch during application. Larger than that means the design needs to be cut into sections, or redrawn so its lines follow the curve rather than crossing it.
The two places the paper usually lifts are the flare of the lower ribs and the soft area over the obliques where the ribcage ends. If those are where your design’s most rigid elements sit, move them now. InkLine’s on-skin preview, an AI-generated image of the design on a generic ribcage rather than your client’s, is useful for judging composition, but it is a visualization, not a measurement of how a design sits on a curved surface — the paper against the actual body is the measurement.
Sizing for ribs: 15–30 cm (6–12 in) tall
The usable field runs from roughly the bottom of the armpit to the top of the hip crest. On an average adult torso that is 25–35 cm of vertical space, but the portion that stays reasonably flat is smaller than that, and it narrows as the ribcage tapers.
Vertical orientation is the default for a reason: running the design along the torso crosses far less curvature per centimeter than running it around the body. A 20 cm design placed vertically may cross one gentle curve. The same design placed horizontally crosses the full barrel of the ribcage and will need sectioning.
Paper math matters more here than on most placements. A4 is 297 mm tall and US Letter 279.4 mm, and InkLine keeps a 5 mm margin at the paper edge, so a portrait sheet holds a design about 27 cm tall on A4 and 26 cm on Letter. Longer paper covers the whole range: US Legal (215.9 × 355.6 mm) holds about 33 cm, enough for most ribs pieces on one sheet, and Tabloid or A3 about 40 cm if your printer takes them. Past that, InkLine tiles the design across up to 3 × 3 sheets. If you pick US Legal and the printer turns out to hold Letter, the job is re-tiled for the real sheet at the same size rather than shrunk, which is one more reason to proof on plain paper before you load transfer paper. If you are still deciding on dimensions, the stencil size calculator will convert a target height into a printable layout. If the piece is heading past 30 cm and onto the sternum, plan it together with the chest placement rather than as two separate stencils that meet by luck.
What curvature and breathing do to the lines
There are two separate deformations at work, and they need separate solutions.
The first is static curvature. Paper is a developable surface: it bends in one direction at a time. The ribcage is curved in two directions simultaneously — around the torso and along its length. Flat paper cannot lie on that shape without either creasing or lifting, and whatever you do to force it flat gets applied to the artwork as well. A straight line becomes a shallow S. Two parallel lines converge at one end. A circle becomes an egg. None of this is a printing problem; it is geometry, and no amount of stencil quality fixes it.
The second is movement. Quiet breathing changes the circumference of the lower ribcage by a centimeter or two, and a full inhale considerably more, with the lower ribs flaring outward as they lift. A stencil applied at full inhale is measurably too wide once the client relaxes. Add the arm: raising it overhead lifts and stretches the entire lateral chest wall, so a stencil applied with the arm up will not sit in the same place when the arm comes down.
Some design elements expose all of this immediately and some hide it entirely:
| Design element | Behavior on ribs |
|---|---|
| Long unbroken straight lines | Worst case — the eye reads any bend against the straight neighbor |
| Grids, repeated parallel spacing | Distortion accumulates and becomes measurable across the piece |
| Perfect circles, symmetrical mandalas | Asymmetry shows at a glance once the surface curves |
| Script following the rib line | Forgiving — the design already curves in the same direction |
| Organic contour work, foliage, smoke, drapery | Very forgiving — there is no reference straight edge |
| Texture-heavy black-and-gray realism | Forgiving; tonal shifts absorb a few millimeters of movement |
Stretch during application is also the main reason ribs stencils thin out and drop sections before the session ends. The mechanics of that are covered in why stencil lines break up, and the ribs version is simply the same problem with more sweat and more movement.
Application: the breathing protocol and the posture rule
The common instruction — take a deep breath and hold it — is the wrong one. A held deep breath is a body state the client cannot maintain and cannot reproduce, so the stencil is sized to a shape that disappears the moment they relax.
Set the client at the end of a normal, relaxed exhale, then ask for shallow, steady breathing throughout application. Consistency matters more than depth, and it is far easier to coach than a breath hold. Say it out loud before you start, not halfway through.
Fix the posture before the stencil touches skin. Decide whether you are tattooing with the arm overhead or down, standing or lying, and apply in that exact position. Shave and clean the area, then let it dry completely — the skin under the arm sweats sooner than anywhere else you work.
Land one contact point at the center of the design, then roll outward with light pressure and let the paper find the curve. Do not pull the sheet taut across the ribs. That pull is precisely what converts a straight line into a curved one, and it happens silently.
For anything over about 20 cm, cut the stencil into two or three sections along a natural break in the design and register each to a landmark you can actually see — the bottom of the sternum, the lowest floating rib, a mole. Sectioning is not a compromise on ribs; it is the standard answer to a doubly curved surface, and it means a smudged section can be reapplied without redoing the whole piece.
When it is dry, have the client breathe deeply, raise and lower the arm and look in a mirror. Anything that shifts noticeably is a problem you fix now, not after the first line.
Which styles suit ribs
Ornamental and filigree work built to follow the rib line is the most forgiving choice available, because the design already curves in the direction the body does. Script and long organic panels work well vertically. Black-and-gray realism is more forgiving than most people expect: there is no long straight edge for the eye to check a bend against, and soft gradients absorb a few millimeters of movement without reading as an error. Geometric grids and precise mandalas are the hardest, because their entire effect depends on a regularity that curvature destroys.
InkLine’s six stencil modes map onto that fairly directly. Linework, the default, traces ornamental and script pieces as solid contour lines, and Outline strips them to the barest contours. Tonal turns the shading of realism stencils into a black-and-white shadow map — dotted lines where each of two to four shadow levels begins, hatching over the darkest, no grey. Dotwork renders tone as stipple, which is worth considering on ribs specifically because individual dots do not reveal a bent line the way a continuous contour does. Sketch keeps a pencil drawing’s grey shading, Denoised is the one to reach for when the reference is a grainy phone photo, and the Cleanup slider works in Linework, Sketch, Denoised and Outline. The manual workflow — processing, editing, print layout and export — is free up to an allowance on how many images you carry through it, and needs a subscription past that; AI generation uses a credit system.
Pain, healing and how ribs age
Ribs are consistently reported among the more painful placements, and the reasons are structural: thin skin, very little subcutaneous fat over bone, and the intercostal nerves running along the lower border of each rib. The area under the arm and the strip closest to the sternum are usually the sharpest. Tell clients this before the deposit, not on the day.
The practical consequence is scheduling. A client who sits comfortably for six hours on a thigh may be finished in two on ribs, which means more sessions and more stencil applications. Keeping a spare printed copy of each section costs one sheet of paper and saves a session.
Aging deserves the same honesty. Skin over the ribs stretches with weight change and pregnancy, and it does so unevenly along the taper toward the waist. Fine detail packed at very tight spacing tends to close up faster here than on an arm. Leave more negative space than the design looks like it wants, and be skeptical of single-needle detail sized for a wrist and then scaled onto a torso.
Free stencils that suit this placement




Frequently asked questions
How big should a ribs tattoo stencil be?
Most ribs pieces sit between 15 and 30 cm (6–12 in) tall, measured vertically along the torso. Below 15 cm a design tends to float on a large field with nothing to anchor it; above 30 cm it usually runs onto the chest, the sternum or the back and should be planned as a panel that continues rather than a single flat print.
Should the client hold their breath while a ribs stencil is applied?
No. Have them finish a normal exhale and then breathe shallowly and steadily. A held deep breath expands the ribcage into a shape they cannot hold for a session and cannot reproduce, so the stencil ends up sized for a body position that never comes back.
Why does my ribs stencil look crooked after it dries?
Usually because the paper was pulled taut across the curve during application. Flat paper only bends in one direction, so stretching it to lie flat on a doubly curved surface transfers that stretch straight into the design. Land one contact point in the center and roll outward instead of pulling.
Can I print a ribs stencil larger than one sheet of paper?
Yes. A 30 cm tall design already exceeds what a portrait A4 or US Letter sheet holds once the edge margin is subtracted, so either tile it across two sheets or use longer paper: a US Legal sheet holds a design about 33 cm tall, and Tabloid or A3 about 40 cm. Print at true scale and check the measured size on the paper before trusting it.
Do ribs hurt more than other tattoo placements?
Most people find ribs among the more painful placements, because the skin is thin, there is little fat over the bone and the intercostal nerves run along the lower edge of each rib. Plan shorter sessions than you would for a thigh or an outer arm.